How to Prepare Brined Chicken
Table of Contents
How to Prepare Brined Chicken
Preparing brined chicken is a straightforward process that can elevate your cooking to the next level. By using a simple chicken brine, you can ensure that your chicken is moist and flavorful.
You may be wondering what brining is and why it’s beneficial. Brining involves soaking the chicken in a saltwater solution before cooking, which helps to retain moisture and add flavor.
In this guide, we will walk you through the steps to prepare delicious brined chicken. We’ll cover the basics of creating a brine, the importance of using the right ingredients, and some tips for achieving the best results.
Key Takeaways
- Brining chicken is a simple process that requires just a few ingredients.
- Using a simple chicken brine can greatly improve the moisture and flavor of your chicken.
- The key to a good brine is using the right balance of salt and other ingredients.
- Brining can be used for various cooking methods, including grilling and roasting.
- With a few simple steps, you can achieve delicious, brine chicken that will impress your family and friends.
The Science Behind Brining Chicken
Understanding the science behind brining chicken can elevate your cooking skills and ensure juicy, flavorful meat every time. Brining involves soaking chicken in a solution of water, salt, and sometimes sugar and other flavorings. This process has a profound effect on the final product.
What Is Brining and Why It Works
Brining is a technique that works on the principle of osmosis, where the saltwater solution penetrates the meat, enhancing its moisture content and flavor. “Osmosis is the movement of water from a region of high concentration to a region of low concentration through a partially permeable membrane,” as defined by food scientists. This process is crucial for achieving tender and flavorful chicken.
The Osmosis Process Explained
When chicken is submerged in a brine, the salt and sugar in the solution help to break down the proteins on the surface of the meat. This breakdown allows the meat to absorb more moisture, resulting in a juicier final product. The osmosis process is key to understanding why brining is so effective.
Benefits of Brined Chicken
Brining chicken offers several benefits, including:
- Enhanced Moisture Retention: Brining helps the chicken retain more moisture, making it juicier.
Enhanced Moisture Retention
- The salt in the brine denatures proteins, allowing the meat to hold more water. This results in a more tender and juicy texture.
- Improved Flavor Distribution: The brine solution infuses flavor into the meat, ensuring that every bite is flavorful.
Improved Flavor Distribution
- As the chicken absorbs the brine, the flavors penetrate deep into the meat, providing a consistent taste throughout.
- Better Texture and Tenderness: Brining tenderizes the chicken, making it more enjoyable to eat.
Better Texture and Tenderness
- The breakdown of proteins during brining results in a more tender texture, enhancing the overall dining experience.
By understanding the science behind brining, you can appreciate the value it adds to your cooking. With its ability to enhance moisture retention, improve flavor distribution, and tenderize the meat, brining is a technique worth mastering.
Essential Ingredients for a Simple Chicken Brine
A simple yet effective chicken brine recipe starts with understanding the essential ingredients and their roles. Creating a brine is not just about mixing salt and water; it’s about crafting a solution that enhances the flavor and texture of your chicken.
Basic Brine Ratio Formula
The foundation of a good brine is the ratio of salt to water. A common starting point is a ratio of 1 tablespoon of salt for every cup of water. This can be adjusted based on personal taste and the specific needs of your recipe.
Salt Types and Recommendations
The type of salt used can significantly impact the flavor of your brine. The choice between different types of salt can affect not just the taste but also the texture of the chicken.
Kosher Salt vs. Table Salt
Kosher salt is often preferred for brining due to its coarser texture and milder flavor compared to table salt. Table salt, being finer and more dense, can make the brine too salty if not used carefully.
Sea Salt Options
Sea salt can add a more complex flavor profile to your brine, with different varieties offering unique tastes. However, it’s essential to choose a sea salt that is not too fine, as it can dissolve too quickly.
Sweeteners and Their Purpose
Adding a sweetener to your brine can balance out the saltiness and enhance the overall flavor. Common sweeteners include sugar, honey, and maple syrup.
Aromatics and Flavor Enhancers
Aromatics such as garlic, onions, and herbs like thyme and rosemary can significantly enhance the flavor of your chicken. These ingredients infuse the brine with complex flavors that penetrate the meat.
| Ingredient | Purpose | Common Options |
|---|---|---|
| Salt | Enhances flavor, tenderizes | Kosher salt, Sea salt |
| Sweetener | Balances saltiness, adds flavor | Sugar, Honey, Maple syrup |
| Aromatics | Adds complex flavors | Garlic, Onions, Thyme, Rosemary |
Wet Brine vs. Dry Brine: Which Is Better?
If you’re looking to enhance the flavor and texture of your chicken, understanding the differences between wet and dry brining is crucial.
Wet Brining Method Overview
Wet brining involves submerging the chicken in a liquid brine solution, typically made with water, salt, and various flavorings like herbs and spices.
This method ensures the chicken stays moist and absorbs flavors evenly.
Dry Brining Method Overview
Dry brining, on the other hand, involves rubbing the chicken with a mixture of salt and other seasonings, then letting it sit in the refrigerator.
This method allows for a more concentrated flavor and can result in a crisper skin when cooked.
Comparing Results and Effort
When deciding between wet and dry brine, consider the differences in flavor intensity, texture, and the effort required for each method.
Flavor Intensity Differences
Wet brining tends to result in a more subtle flavor, as the brine chicken absorbs the flavors gradually.
Dry brining, with its concentrated salt and seasonings, can produce a more intense flavor profile.
Texture Comparison
Wet brining keeps the chicken moist, resulting in a tender texture.
Dry brining can lead to a crisper skin, but the meat may be slightly drier if not cooked properly.
Time and Space Requirements
Wet brining requires more space, as you need a large container to submerge the chicken.
Dry brining is more convenient in terms of space, as you can place the chicken on a wire rack or tray.
Ultimately, the choice between wet and dry brine comes down to your personal preference and the specific results you’re looking to achieve with your brined chicken.
Simple Chicken Brine Recipe Step-by-Step
A simple chicken brine can elevate your chicken dishes, and making one is easier than you think with the right guidance. To start, you’ll need to gather your ingredients and equipment.
Gathering Your Ingredients
For a basic simple chicken brine, you’ll need water, salt, sugar, and any desired aromatics like garlic, onion, or herbs. The quality of your ingredients can affect the flavor, so choose fresh and appropriate items.
Preparing the Brine Solution
To prepare the brine, combine 1 quart of water with 1/4 cup of kosher salt and 2 tablespoons of brown sugar in a saucepan. Heat the mixture over low heat, stirring until the salt and sugar are dissolved.
| Ingredient | Quantity |
|---|---|
| Water | 1 quart |
| Kosher Salt | 1/4 cup |
| Brown Sugar | 2 tablespoons |
Cooling the Brine Properly
After dissolving the salt and sugar, remove the brine from the heat and let it cool to room temperature. You can speed up the cooling by placing the saucepan in an ice bath or by adding ice packs to the brine.
Submerging the Chicken
Once the brine is cooled, it’s time to submerge your chicken. Ensure the chicken is fully covered by the brine.
Container Selection Tips
Choose a container that is large enough to hold the chicken and the brine. A large bowl or a food-grade plastic container works well. Avoid using reactive containers like aluminum.
Ensuring Full Coverage
To ensure the chicken is fully submerged, you can use a plate or a lid to weigh it down. This is crucial for even brining.
By following these steps, you can create a simple chicken brine recipe that enhances the flavor and moisture of your chicken dishes.
Brining Times for Different Chicken Cuts
The key to successfully brining chicken lies in understanding the appropriate brining times for various chicken cuts. Brining is a process that enhances the flavor and moisture of chicken, but the duration of brining can significantly impact the final result. Different chicken cuts have different brining time requirements.
Whole Chicken Brining Guide
A whole chicken typically requires a longer brining time compared to smaller cuts. Generally, a whole chicken should be brined for 8 to 12 hours. This allows the brine to penetrate deeply into the meat, ensuring it’s both flavorful and juicy.
Chicken Breast Brining Times
Chicken breasts are leaner and have less connective tissue than other parts, so they require less time in the brine. Typically, 2 to 4 hours is sufficient for chicken breasts. Over-brining can make them overly salty and mushy.
Thighs, Legs, and Wings
Thighs, legs, and wings have more connective tissue and can benefit from longer brining times. For these cuts, 4 to 6 hours is usually adequate. However, they can be left in the brine for up to 8 hours without significant risk of over-brining.
Signs of Over-Brining
Over-brining can result in chicken that’s too salty or has an unpleasant texture. Signs include a mushy texture or an overly salty taste. If you notice these signs, it’s best to adjust your brining time downward for future attempts.
Equipment Needed for Brining Chicken
The key to a successful brine lies in the equipment you use. Brining chicken requires a few essential items that will help you achieve the perfect balance of flavor and moisture.
Containers and Vessels
You will need a container that is large enough to hold the chicken and the brine solution. You can use a large bowl, a brining bag, or a food-grade bucket. Make sure the container is clean and sanitized before use.
Some popular options for containers include:
- Large glass or stainless steel bowls
- Brining bags or food-grade plastic bags
- Food-grade buckets or containers with lids
Space Requirements
Make sure you have enough space in your refrigerator or cooler to accommodate the container with the chicken and brine solution. You may need to adjust the position of other items or use a separate cooler for larger batches.
Temperature Control Methods
Temperature control is crucial when brining chicken. You can use the following methods to keep the brine at a safe temperature:
Refrigerator Brining
Brining in the refrigerator is the most convenient method. Simply place the container with the chicken and brine solution in the refrigerator and keep it at a temperature below 40°F (4°C).
Cooler Brining for Larger Batches
If you need to brine a large batch of chicken, you can use a cooler with ice to keep the temperature cool. Make sure to monitor the temperature and add ice as needed to keep it below 40°F (4°C).
Food Safety When Brining Chicken
To avoid foodborne illnesses, it’s essential to follow safe brining practices when handling and storing chicken. Brining, while a simple process, requires attention to detail to prevent contamination and ensure the chicken is safe to eat.
Temperature Control Guidelines
Keeping the brine and chicken at a safe temperature is critical. The ideal refrigerator temperature is at or below 40°F (4°C). Always use a refrigerator thermometer to ensure the temperature remains consistent.
Cross-Contamination Prevention
Preventing cross-contamination is vital when handling raw chicken. Always wash your hands thoroughly before and after handling the chicken, and make sure any utensils or containers that come into contact with the raw chicken are washed with soap and warm water.
Maximum Brining Duration Safety
The maximum brining time depends on the size and type of chicken. Generally, for most chicken cuts, 24 hours is sufficient. However, for whole chickens, it can be up to 48 hours. Exceeding these times can lead to over-brining and potentially create an environment conducive to bacterial growth.
Proper Disposal of Used Brine
After brining, it’s crucial to dispose of the used brine properly. Do not reuse the brine, as it can contain harmful bacteria from the raw chicken. Dispose of it down the drain or toilet, and thoroughly clean any containers or utensils that came into contact with the brine.
| Brining Safety Tips | Description |
|---|---|
| Temperature Control | Keep brine and chicken at or below 40°F (4°C) |
| Cross-Contamination Prevention | Wash hands and utensils after handling raw chicken |
| Brining Duration | Do not exceed 24 hours for most cuts, 48 hours for whole chickens |
| Brine Disposal | Dispose of used brine down the drain or toilet |
Flavor Variations for Your Chicken Brine
Brining chicken is a versatile process that allows you to infuse various flavors into your chicken. By experimenting with different ingredients, you can create a wide range of flavor profiles to suit your taste preferences.
Herb-Infused Brines
One way to add flavor to your brine is by incorporating herbs. This can be done by adding fresh or dried herbs to the brine solution.
Mediterranean Herb Blend
A Mediterranean herb blend can add a rich, savory flavor to your chicken. This blend typically includes herbs like thyme, rosemary, and oregano.
Classic Poultry Herbs
Classic poultry herbs like sage, parsley, and dill can also be used to create a delicious brine. These herbs complement the natural flavor of the chicken without overpowering it.
Citrus and Fruit Additions
Adding citrus or fruit to your brine can introduce a bright, tangy flavor to your chicken. Lemons, oranges, and apples are popular choices for adding a fruity twist.
Spicy Brine Variations
If you like a bit of heat in your chicken, you can create a spicy brine by adding ingredients like chili peppers or hot sauce.
International Flavor Profiles
You can also draw inspiration from international cuisines to create unique flavor profiles. For example, you can create a Korean-style brine with ingredients like ginger, garlic, and gochujang, or a Mexican-inspired brine with lime juice and cilantro.
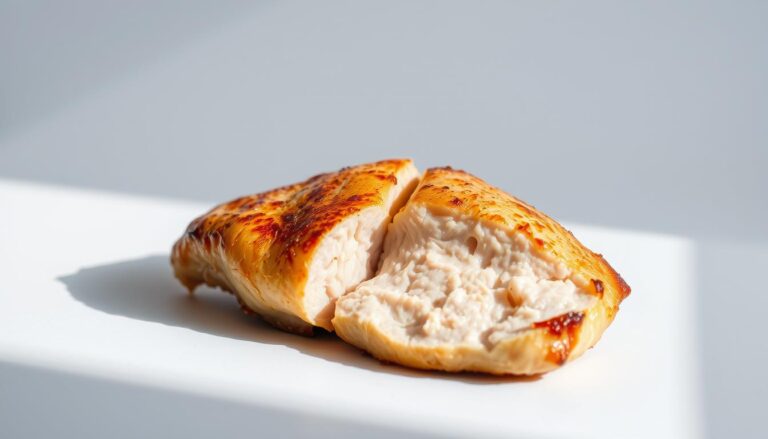
How to Cook Brined Chicken for Best Results
Cooking brined chicken requires some finesse, but with the right techniques, you can achieve outstanding results. After brining, your chicken is ready to be cooked using various methods, each with its unique benefits.
Preparing Brined Chicken for Cooking
Before you start cooking, there are a few steps to follow to ensure your brined chicken turns out perfectly. These include deciding whether to rinse the chicken and how to dry it.
Rinsing vs. Not Rinsing
Some cooks prefer to rinse their brined chicken under cold water to remove excess salt, while others argue that this step can wash away flavorful compounds. If you choose to rinse, make sure to pat the chicken dry afterward.
Drying Techniques
Drying your chicken, either by air-drying or patting it dry with paper towels, is crucial for achieving crispy skin. This step is especially important if you’re planning to roast or grill your chicken.
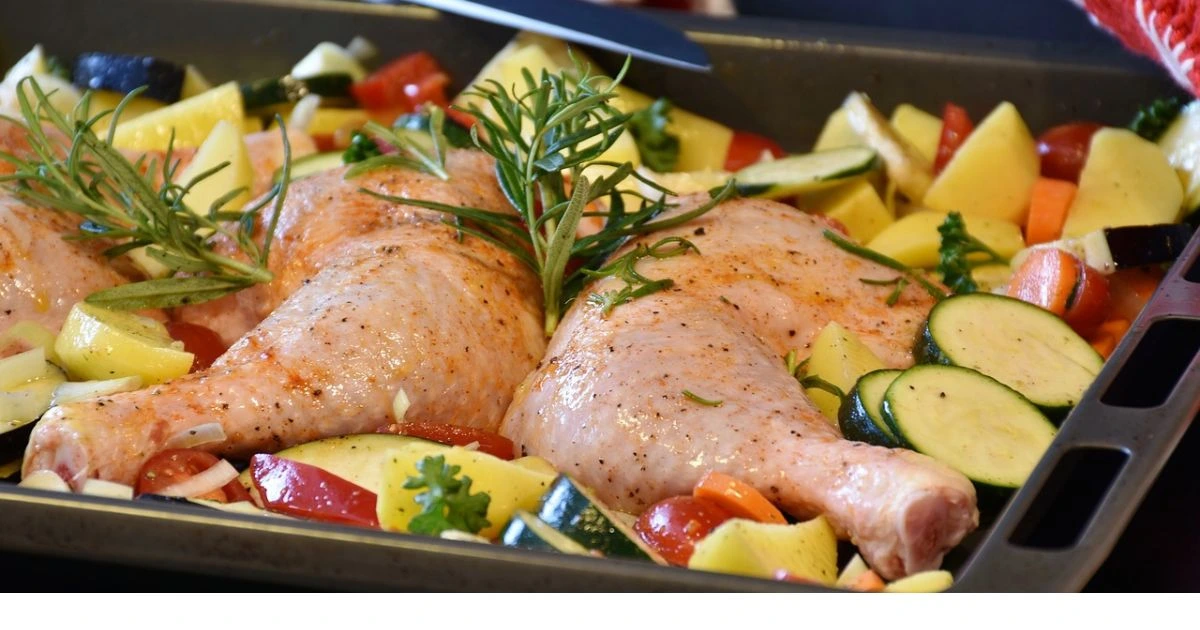
Roasting Techniques
Roasting is a popular method for cooking brined chicken, as it allows for even browning and crisping of the skin. To roast your chicken, preheat your oven to 425°F (220°C), season the chicken as desired, and roast until it reaches an internal temperature of 165°F (74°C).
Grilling Methods
Grilling brined chicken can add a smoky flavor and a nice char. Make sure to preheat your grill to medium-high heat and cook the chicken until it’s cooked through, turning occasionally to prevent burning.
Frying Considerations
Frying brined chicken can result in juicy meat and crispy exterior. To achieve this, heat your oil to the right temperature (usually between 350°F to 375°F or 175°C to 190°C), and fry until the chicken is golden brown and cooked through.
| Cooking Method | Temperature | Internal Temperature Goal | Tips |
|---|---|---|---|
| Roasting | 425°F (220°C) | 165°F (74°C) | Pat dry for crispy skin |
| Grilling | Medium-High Heat | 165°F (74°C) | Turn occasionally |
| Frying | 350°F – 375°F (175°C – 190°C) | 165°F (74°C) | Don’t overcrowd the pot |
Conclusion
Now that you’ve learned the ins and outs of creating a simple chicken brine and executing a perfect brine recipe, it’s time to put your knowledge into practice. Brining is a straightforward process that yields impressive results, making it a great technique to have in your cooking arsenal.
By using a simple chicken brine, you can achieve juicy, flavorful chicken that’s sure to impress. Whether you’re roasting, grilling, or frying, a well-brined chicken will be a hit. The key is to experiment with different flavor variations and cooking methods to find what works best for you.
With the basics covered, feel free to get creative with your brine recipe. Try adding different herbs, spices, or citrus fruits to create unique flavor profiles. As you become more comfortable with brining, you’ll be able to adapt the technique to suit your cooking needs and preferences.
By incorporating a simple chicken brine into your cooking routine, you’ll be able to elevate your dishes and provide a more enjoyable dining experience. So, go ahead and give brining a try – you might be surprised at the difference it makes.
FAQ
What is brining chicken, and why is it beneficial?
Brining chicken involves soaking the chicken in a solution of water, salt, and sometimes sugar and other flavorings before cooking. This process enhances the chicken’s moisture retention, flavor distribution, and texture, resulting in a more tender and juicy final product.
What is the basic ratio for a simple chicken brine recipe?
A basic brine ratio is typically around 1 cup of kosher salt to 1 gallon of water, with optional additions like sugar, herbs, and spices to enhance flavor. You can adjust this ratio according to your specific needs and the size of the chicken you are brining.
Can I use table salt instead of kosher salt for brining?
While you can use table salt, kosher salt is preferred due to its coarser texture and milder flavor, which makes it easier to mix and results in a more balanced brine. Table salt is finer and may result in an overly salty brine if not adjusted properly.
What are the differences between wet brine and dry brine methods?
Wet brining involves submerging the chicken in a liquid brine solution, while dry brining involves rubbing the chicken with salt and other seasonings without using additional liquid. Wet brining is more traditional and can result in a more moist product, while dry brining is simpler and can provide a crisper skin.
How long should I brine different chicken cuts?
Brining times vary by chicken cut: a whole chicken typically needs 8-12 hours, chicken breasts 2-4 hours, and thighs, legs, and wings 2-4 hours. Always check that the chicken is not over-brined, as this can lead to an overly salty or mushy texture.
What are some common flavor variations for chicken brine?
You can customize your brine with various flavorings such as herb-infused brines (using herbs like thyme, rosemary, or parsley), citrus and fruit additions (like lemons or oranges), spicy elements (like chili peppers or peppercorns), or international flavors (like Asian-style with soy sauce or Mexican-inspired with lime and cilantro).
How do I ensure food safety when brining chicken?
To maintain food safety, keep the brine at a refrigerated temperature (below 40°F), prevent cross-contamination by using clean utensils and containers, do not brine for too long (check recommended times for specific chicken cuts), and properly dispose of the used brine after brining.
Should I rinse the chicken after brining before cooking?
Rinsing the chicken after brining is optional. Some people prefer to rinse to remove excess salt, while others prefer not to rinse to retain the flavors absorbed during brining. If you choose to rinse, pat the chicken dry before cooking to help achieve a crisper exterior.